How to Pop a Pimple: without making it worse
Leaving pimples “alone” is good advice for some spots (inflamed, deep, painful). But if you know how to pop a pimple and when, it can work. This page will show you exactly how to do it.
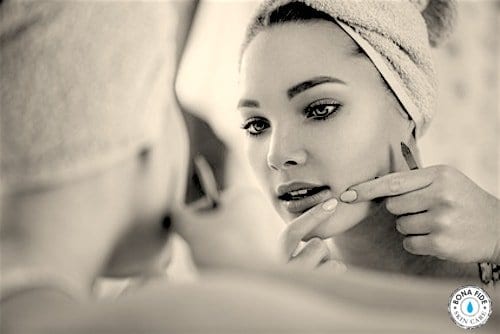
There is no denying a good squeeze can be deeply satisfying. Once that pimple “core” pops out, you know you’ve done good!
The problem is, sometimes a pimple doesn’t pop easily, shouldn’t be squeezed at all, or you get a little carried away and cause a scar.
Don’t worry, popping certain types of pimples is okay. Just follow the steps on this page to make sure you do it right—so you can get rid of the spot faster and prevent further damage.
Popping Pimples at the Wrong Time Can Cause Scars
Pimples often bleed, and they can turn into a scab which is what causes scarring. An over-zealous squeeze will break the skin and cause more inflammation.
BUT squeezing can work for “whiteheads” that are close to the surface of your skin. Any deep painful inflamed pimples or cysts should never be squeezed. These need a different approach.
So When is the Right Time?
- Not when it first shows up —this is when it’s still forming deep in the layers of the skin.
- Squeezing it now will make it worse. Guaranteed.
- If there’s still a lot of redness and it has a ‘shiny’ look as if it’s stretching the skin underneath, leave it alone
- After 12-24hrs it will start developing more of a whitehead. When the white head is more than the redness, it’s nearly time…
- Time is right when the spot is no longer tender and red, and the whitehead looks like it’s “bulging” out of the skin
The Right Technique: Step by Step Pimple Popping
Preparation is key!
- Use heat to draw the blockage to the surface of the skin and open the pore
- Press a cotton ball that has been soaked in hot water to the spot for a minute
Can you use a needle to pop a pimple?
Professionals sometimes use a sterile needle in extractions to carefully break the surface of skin, allowing pus drain and avoiding damage to the skin’s surface.
The most important thing is ensuring you only break the very top layer of skin to release the goo. Any deeper and you’re effectively cutting your skin which might scar.
There should be no blood or pain whatsoever, you should just feel a mild scratching. Here is how to pop a pimple with a needle:
- Use a thin sterile needle.
- With the needle lying almost flat across your skin gently make a tiny tear in the absolute top layer of the skin over the whitehead
- If the pimple is ready, pressure releases and the pus will start to ooze out by itself. Then follow the steps below to finish it off
How to Pop a Pimple:
- Wrap a tissue around each index finger
- Place your fingers on opposite sides of the zit. Apply pressure from the sides NOT the top
- Gently push down and then squeeze gently in a rolling-up motion
- Move your fingers around and repeat
The important thing to remember when popping a pimple is the DOWNWARDS pressure, from the bottom so the “contents” are forced out the top. This should happen easily. If it doesn’t, stop.
Keep going gently until no more pus comes out. Then stop. Squeezing beyond this point is what leads to bruises and possibly long term scarring.
After you have popped a pimple:
1: Remove the Gunk
When you have popped a pimple, make sure you have done it right—this means all the way.
Remove the white gunk from the pimple as much as you possibly can.
The chances of the pimple reappearing are high if there is even a slightest amount of gunk left in the pore. If the popped pimple feels tender when you press it gently, there is likely still some gunk left.
Keep in mind that you shouldn’t squeeze the pimple too hard, but enough to get that last bit out. Usually you know it’s “all clear” if blood starts to appear. Definitely stop at this point, or risk a bruise forming.
The next step is very important:
2: Apply Ice
Once you have cleared the popped pimple, apply ice to the area. Make sure you wrap the ice in a clean cloth or paper towel before applying. If your skin is sensitive, you can double wrap the cube before gently applying it on the affected area.
Hold the ice to your skin for 5 minutes, remove for 5 minutes, and repeat. Do this as much as you can – ideally at least three times. The more the better!
3: Apply Gentle Pressure
Next, gently put a bit of pressure on the popped pimple for around 30 seconds with your finger covered in a tissue. This helps drain the remaining fluid from the swollen tissues and clear the pore.
Remember – this is not another squeeze. Think of it like the pressure you apply to your shin after you knock it as a way to reduce pain and swelling.
4: Give Your Skin Rest
Once you have applied the ice and done the above, leave it alone. Even if clear liquid starts to come out of the hole, simply dab the spot or leave it.
You can continue the ice application about an hour later if the swelling and redness has not decreased enough, or it it is still painful.
5: Optional: Take Medication
This step is not necessary unless you are experiencing discomfort and pain due to the swelling. Take anti-inflammatory medication like aspirin or ibuprofen. Make sure you follow the directions on the packet.
6: Apply Antibiotic Cream
After applying ice, wait for an hour and then dab on an antibiotic ointment (first aid cream) to prevent infection or the spread of pimples in the surrounding area.
A simple antibiotic cream from the pharmacy or your first aid kit is all you need.
What about that “clear liquid” that comes out?
This stuff is a good sign. If it is truly clear with no more gunk, you are at the end.
But it can keep leaking out and get annoying. Dab the spot with rubbing alcohol or an astringent toner to help dry it out. This stings for a second but really works.
7: Keep it Clean
After popping a pimple the skin is left open, which means it is easier for bacteria to enter and spread. So it is crucial that you keep the area constantly clean.
For the next day or two, cleanse the area gently and dab dry with a tissue. Follow with the bacteria cream as above if you want to.
Prevent Scarring and Returning
It is important to take good care of the affected area to avoid scarring and ensuring the pimple doesn’t return.
1. Apply a Quick Black Tea Bag “Mask”
Steep a black tea bag in hot water it for a minute. Squeeze out the water and place it on the pimple. Ensure that the tea bad isn’t too hot.
The tannins in black tea work as an astringent, reducing irritation on skin. This reduces swelling and redness (and this is why black tea bags also make great eye masks!)
2. Aloe Vera
Aloe vera is loaded with antibacterial and anti-inflammatory properties that reduce redness and swelling while speeding up the healing process.
3. Tea Tree Oil
Tea tree oil fights bacteria and decreases swelling and irritation on skin. It a great spot treatment for acne.
Simply mix two drops of oil with two drops of water and use a cotton bud to dab it on the affected area. Leave it on for twenty minutes and gently wipe off.
More ways to use tea tree oil for acne here.
4. Avoid Makeup (but not really…)
Before using makeup to cover the red spot, apply some antibiotic cream and leave it for a few minutes. Then apply concealer with a clean Q-Tip and blot powder over top using a tissue.
Be sure to cleanse gently at the end of the day and reapply antibiotic cream.
If the spot begins to flake or dry out apply a dab of Vaseline before concealer. This also helps healing.
5. Use a Warm Compress
Once the pimple starts healing, you can apply a warm compress and leave it on for 15 minutes.
This helps bring the blood supply to the tissues to promote healing.
6. Crush Aspirin to Help Relieve Pain
Aspirin can help with pain-relief and swelling. It also dries up the pimple to speed up the healing process. (See this article for more info on dealing with painful pimples).
Crush aspirin into a powder and create a paste with water. Use a cotton bud to apply to skin and leave it on for a few hours before washing.
7. Don’t Touch: Once You’ve Popped, Stop
As tempting as it is to just give the pimple another go… try not to as it can spread bacteria and cause more pimples. Picking, squeezing or popping the blemish again is usually what increases the chances of scarring, discoloration, or infection.
Once the pimple starts healing and is fully dry (after a day or two), apply Vaseline to help the healing process. You can also apply this underneath makeup as you cover up the blemish.
This is a really important tip to ensure the spot heals with minimal scarring.
